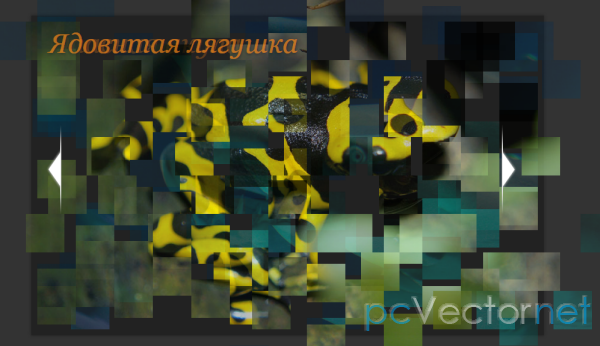
Вращающийся слайдер изображений

Ассиметричный слайдер изображений в котором при смене картинок происходит их небольшой поворот. Добавлена опция автозапуска и прокрутка с помощью колесика мыши.
В слайдере будем использовать плагин jQuery 2D Transformation Plugin для поворота изображений и плагин jQuery Mousewheel Plugin для использования колесика мыши.
Подключаем необходимые файлы:
<script type="text/jаvascript" src="http://ajax.googleapis.com/ajax/libs/jquery/1.6.1/jquery.min.js"></script>
<script type="text/jаvascript" src="js/jquery.transform-0.9.3.min_.js"></script>
<script type="text/jаvascript" src="js/jquery.mousewheel.js"></script>
<script type="text/jаvascript" src="js/jquery.RotateImageMenu.js"></script>
HTML
Во-первых создадим оболочку вокруг всех наших элементов слайдера:
<div class="rm_wrapper">
...
</div>
Внутри оболочки поместим контейнер со списком, масками и угловыми элементами, заголовок и скрытый DIV содержащий всё множество изображений.
<div id="rm_container" class="rm_container">
    <ul>
        <li data-images="rm_container_1" data-rotation="-15">
            <img src="images/1.jpg"/>
        </li>
        <li data-images="rm_container_2" data-rotation="-5">
            <img src="images/2.jpg"/>
        </li>
        <li data-images="rm_container_3" data-rotation="5">
            <img src="images/3.jpg"/>
        </li>
        <li data-images="rm_container_4" data-rotation="15">
            <img src="images/4.jpg"/>
        </li>
    </ul>
    <div id="rm_mask_left" class="rm_mask_left"></div>
    <div id="rm_mask_right" class="rm_mask_right"></div>
    <div id="rm_corner_left" class="rm_corner_left"></div>
    <div id="rm_corner_right" class="rm_corner_right"></div>
    <h2>Angelina Jolie Voight</h2>
    <div style="display:none;">
        <div id="rm_container_1">
            <img src="images/1.jpg"/>
            <img src="images/5.jpg"/>
            <img src="images/6.jpg"/>
            <img src="images/7.jpg"/>
        </div>
        <div id="rm_container_2">
            <img src="images/2.jpg"/>
            <img src="images/8.jpg"/>
            <img src="images/9.jpg"/>
            <img src="images/10.jpg"/>
        </div>
        <div id="rm_container_3">
            <img src="images/3.jpg"/>
            <img src="images/11.jpg"/>
            <img src="images/12.jpg"/>
            <img src="images/13.jpg"/>
        </div>
        <div id="rm_container_4">
            <img src="images/4.jpg"/>
            <img src="images/14.jpg"/>
            <img src="images/15.jpg"/>
            <img src="images/16.jpg"/>
        </div>
    </div>
</div>DIVы масок и углов будут абсолютными элементами, которые будем помещать над слайдером.
Далее добавим элементы навигации и управления автозапуском.
<div class="rm_nav">
    <a id="rm_next" href="#" class="rm_next"></a>
    <a id="rm_prev" href="#" class="rm_prev"></a>
</div>
<div class="rm_controls">
    <a id="rm_play" href="#" class="rm_play">Плей</a>
    <a id="rm_pause" href="#" class="rm_pause">Пауза</a>
</div>
CSS
Сначала установим некоторые стили и определим свойства для body (если у нас будет другой цвет фона, то придется изменять и цвет фона и границ некоторых элементов самого слайдера).
@import url('reset.css');
body{
    background:#f0f0f0;
    color:#000;
    font-family: 'PT Sans Narrow', Arial, sans-serif;
    font-size:16px;
}
a{
    color:#000;
    text-decoration:none;
}
h1{
    padding:10px;
    margin:20px;
    font-size:40px;
    text-transform:uppercase;
    text-shadow:0px 0px 1px #fff;
    color:#333;
    background:transparent url(../images/line.png) repeat-x bottom left;
}.rm_wrapper{
width:1160px;
margin:0 auto;
position:relative;
}.rm_container{
width:1050px;
overflow:hidden;
position:relative;
height:530px;
margin:0 auto;
}.rm_container h2{
background:transparent url(../images/lines.png) repeat top left;
padding:10px 30px;
position:absolute;
bottom:170px;
right:0px;
color:#000;
font-size:36px;
text-transform:uppercase;
text-shadow:1px 0px 1px #fff;
}.rm_container ul{
width:1170px;
}.rm_mask_right, .rm_mask_left{
position: absolute;
height: 110px;
background: #f0f0f0;
width: 530px;
bottom: -30px;
left: 0px;
-moz-transform:rotate(-3deg);
-webkit-transform:rotate(-3deg);
transform:rotate(-3deg);
}
.rm_mask_right{
left:auto;
right:0px;
-moz-transform:rotate(3deg);
-webkit-transform:rotate(3deg);
transform:rotate(3deg);
}
.rm_corner_right, .rm_corner_left{
background: #f0f0f0;
position:absolute;
width:200px;
height:100px;
bottom:0px;
left:-65px;
-moz-transform:rotate(45deg);
-webkit-transform:rotate(45deg);
transform:rotate(45deg);
}
.rm_corner_right{
left:auto;
right:-65px;
-moz-transform:rotate(-45deg);
-webkit-transform:rotate(-45deg);
transform:rotate(-45deg);
}.rm_nav a{
position:absolute;
top:200px;
width:38px;
height:87px;
cursor:pointer;
opacity:0.7;
}
.rm_nav a:hover{
opacity:1.0;
}
.rm_nav a.rm_next{
background:transparent url(../images/next.png) no-repeat top left;
right:0px;
}
.rm_nav a.rm_prev{
background:transparent url(../images/prev.png) no-repeat top left;
left:0px;
}.rm_controls{
position:absolute;
top:0px;
left:-40px;
height:20px;
}
.rm_controls a{
cursor:pointer;
opacity:0.7;
padding-left:24px;
font-size:16px;
text-transform:uppercase;
height:20px;
float:left;
line-height:20px;
}
.rm_controls a:hover{
opacity:1.0;
}
.rm_controls a.rm_play{
display:none;
background:transparent url(../images/play.png) no-repeat center left;
}
.rm_controls a.rm_pause{
background:transparent url(../images/pause.png) no-repeat center left;
}JS
Начнем с кеширования элементов и проверки, если будем иметь дело с особенным браузером)
//our 4 items
var $listItems         = $('#rm_container > ul > li'),
    totalItems        = $listItems.length,
    //the controls
    $rm_next        = $('#rm_next'),
    $rm_prev        = $('#rm_prev'),
    $rm_play        = $('#rm_play'),
    $rm_pause        = $('#rm_pause'),
    //the masks and corners of the slider
    $rm_mask_left    = $('#rm_mask_left'),
    $rm_mask_right    = $('#rm_mask_right'),
    $rm_corner_left    = $('#rm_corner_left'),
    $rm_corner_right= $('#rm_corner_right'),
    //check if the browser is <= IE8
ieLte8 = ($.browser.msie && parseInt($.browser.version) <= 8),RotateImageMenu = (function() {
...
})();
RotateImageMenu.init(); //difference of animation time between the items
var timeDiff = 300,
//time between each image animation (slideshow)
slideshowTime = 3000,
slideshowInterval,
//checks if the images are rotating
isRotating = false,
//how many images completed each slideshow iteration
completed = 0,
/*
all our images have 310 of width and 465 of height.
this could / should be dynamically calculated
if we would have different image sizes.
we will set the rotation origin at
x = width/2 and y = height*2
*/
origin = ['155px', '930px'],
init = function() {
configure();
initEventsHandler();
},
//initialize some events
initEventsHandler = function() {
/*
next and previous arrows:
we will stop the slideshow if active,
and rotate each items images.
1 rotate right
-1 rotate left
*/
$rm_next.bind('click', function(e) {
stopSlideshow();
rotateImages(1);
return false;
});
$rm_prev.bind('click', function(e) {
stopSlideshow();
rotateImages(-1);
return false;
});
/*
start and stop the slideshow
*/
$rm_play.bind('click', function(e) {
startSlideshow();
return false;
});
$rm_pause.bind('click', function(e) {
stopSlideshow();
return false;
});
/*
adds events to the mouse and left / right keys
*/
$(document).bind('mousewheel', function(e, delta) {
if(delta > 0) {
stopSlideshow();
rotateImages(0);
}
else {
stopSlideshow();
rotateImages(1);
}
return false;
}).keydown(function(e){
switch(e.which){
case 37:
stopSlideshow();
rotateImages(0);
break;
case 39:
stopSlideshow();
rotateImages(1);
break;
}
});
},
/*
rotates each items images.
we set a delay between each item animation
*/
rotateImages = function(dir) {
//if the animation is in progress return
if(isRotating) return false;
isRotating = true;
$listItems.each(function(i) {
var $item = $(this),
/*
the delay calculation.
if rotation is to the right,
then the first item to rotate is the first one,
otherwise the last one
*/
interval = (dir === 1) ? i * timeDiff : (totalItems - 1 - i) * timeDiff;
setTimeout(function() {
//the images associated to this item
var $otherImages = $('#' + $item.data('images')).children('img'),
totalOtherImages = $otherImages.length;
//the current one
$img = $item.children('img:last'),
//keep track of each items current image
current = $item.data('current');
//out of bounds
if(current > totalOtherImages - 1)
current = 0;
else if(current < 0)
current = totalOtherImages - 1;
//the next image to show and its
//initial rotation (depends on dir)
var otherRotation = (dir === 1) ? '-30deg' : '30deg',
$other = $otherImages.eq(current).clone();
//for IE <= 8 we will not rotate,
//but fade out / fade in ...
//better than nothing :)
if(!ieLte8)
$other.css({
rotate : otherRotation,
origin : origin
});
(dir === 1) ? ++current : --current;
//prepend the next image to the <li>
$item.data('current', current).prepend($other);
//the final rotation for the current image
var rotateTo = (dir === 1) ? '80deg' : '-80deg';
if(!ieLte8) {
$img.animate({
rotate : rotateTo
}, 1200, function(){
$(this).remove();
++completed;
if(completed === 4) {
completed = 0;
isRotating = false;
}
});
$other.animate({
rotate : '0deg'
}, 600);
}
else {
$img.fadeOut(1200, function(){
$(this).remove();
++completed;
if(completed === 4) {
completed = 0;
isRotating = false;
}
});
}
}, interval );
});
},
//set initial rotations
configure = function() {
if($.browser.msie && !ieLte8)
rotateMaskCorners();
else if(ieLte8)
hideMaskCorners();
$listItems.each(function(i) {
//the initial current is 1
//since we already showing the first image
var $item = $(this).data('current', 1);
if(!ieLte8)
$item.transform({rotate: $item.data('rotation') + 'deg'})
.find('img')
.transform({origin: origin});
});
},
//rotates the masks and corners
rotateMaskCorners = function() {
$rm_mask_left.transform({rotate: '-3deg'});
$rm_mask_right.transform({rotate: '3deg'});
$rm_corner_left.transform({rotate: '45deg'});
$rm_corner_right.transform({rotate: '-45deg'});
},
//hides the masks and corners
hideMaskCorners = function() {
$rm_mask_left.hide();
$rm_mask_right.hide();
$rm_corner_left.hide();
$rm_corner_right.hide();
},
startSlideshow = function() {
clearInterval(slideshowInterval);
rotateImages(1);
slideshowInterval = setInterval(function() {
rotateImages(1);
}, slideshowTime);
//show the pause button and hide the play button
$rm_play.hide();
$rm_pause.show();
},
stopSlideshow = function() {
clearInterval(slideshowInterval);
//show the play button and hide the pause button
$rm_pause.hide();
$rm_play.show();
};
return {init : init};