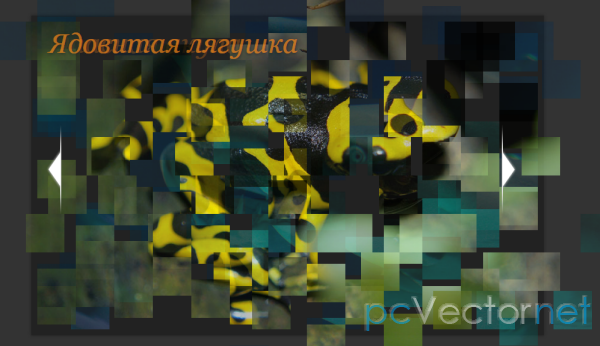
Эффект затвора камеры для слайдшоу
Теперь своё портфолио из фотографий можно красиво оформить с помощью слайдшоу, использующего jQuery и элемент HTML5 - canvas, в котором смена фотографии происходит с эффектом затвора камеры.
Идея
Элемент canvas представляет из себя специальную область, в которой можно создавать растровые изображения с помощью jаvascript и проводить всевозможные манипуляции с ними. Однако, существуют и ограничения на его использование. Создание сложной анимации в реальном времени требует перерисовки canvas-ом каждого кадра, и как следствие, большой вычислительной мощности, которую в данный момент современные браузеры просто не могут обеспечить. Отсюда, плавная анимация практически невозможна. Но существует способ позволяющий обойти этот недостаток. Если вы уже посмотрели Демо, то заметили, что оно довольно плавно работает. Это происходит потому, что кадры формируются заранее и каждый из них построен, как отдельный canvas элемент.

После первоначальной загрузки страницы (когда генерируются кадры), работа плагина сводится к простому цикличному прокручиванию кадров.
HTML
<!DOCTYPE html PUBLIC "-//W3C//DTD XHTML 1.0 Transitional//EN" "http://www.w3.org/TR/xhtml1/DTD/xhtml1-transitional.dtd">
<html xmlns="http://www.w3.org/1999/xhtml">
<head>
<meta http-equiv="Content-Type" content="text/html; charset=utf-8" />
<title>Эффект затвора на Canvas и jQuery | pcvector.net</title>

<link rel="stylesheet" type="text/css" href="assets/css/styles.css" />
<link rel="stylesheet" type="text/css" href="assets/jquery.shutter/jquery.shutter.css" />

<script type="text/javascript" src="http://ajax.googleapis.com/ajax/libs/jquery/1.5.1/jquery.min.js"></script>
<script src="assets/jquery.shutter/jquery.shutter.js"></script>
<script src="assets/js/script.js"></script>

</head>
<body>

<div id="top"></div>

<div id="page">
    <div id="container">
        <ul>
            <li><img src="assets/img/photos/1.jpg" width="640" height="400" alt="Landscape" /></li>
            <li><img src="assets/img/photos/2.jpg" width="640" height="400" alt="Yacht club" /></li>
            <li><img src="assets/img/photos/3.jpg" width="640" height="400" alt="Desert" /></li>
            <li><img src="assets/img/photos/4.jpg" width="640" height="400" alt="Machinery" /></li>
        </ul>
    </div>
</div>

</body>
</html>
Стили для страницы и плагина подключены в head, так же как и файлы скриптов.
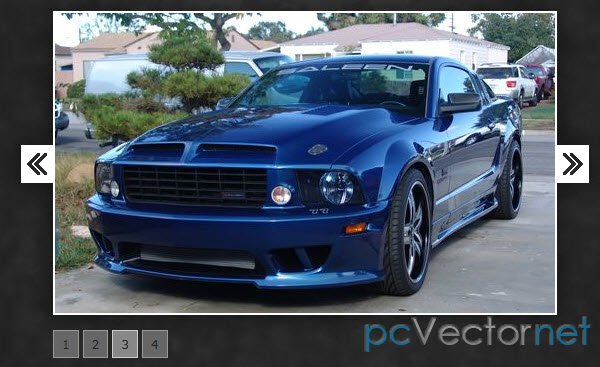
DIV #container содержит неупорядоченный список из четырех фотографий, которые будут отображаться в виде слайдшоу. Если браузер пользователя не поддерживает элемент canvas, то изображения будут циклично меняться, но без эффекта затвора.
Когда вызывается плагин затвора, то он формирует следующую HTML разметку.
В нашем примере, для элемента DIV #container.
<div class="shutterAnimationHolder" style="width: 640px; height: 400px;">
    <div class="film" style="height: 15000px; width: 1000px; margin-left: -500px; top: -300px;">
        <canvas width="1000" height="1000"></canvas>
        <canvas width="1000" height="1000"></canvas>
        <canvas width="1000" height="1000"></canvas>
        <canvas width="1000" height="1000"></canvas>
        <canvas width="1000" height="1000"></canvas>
        <canvas width="1000" height="1000"></canvas>
        <canvas width="1000" height="1000"></canvas>
        <canvas width="1000" height="1000"></canvas>
        <canvas width="1000" height="1000"></canvas>
        <canvas width="1000" height="1000"></canvas>
        <canvas width="1000" height="1000"></canvas>
        <canvas width="1000" height="1000"></canvas>
        <canvas width="1000" height="1000"></canvas>
        <canvas width="1000" height="1000"></canvas>
        <canvas width="1000" height="1000"></canvas>
    </div>
</div>
Каждый canvas элемент содержит один кадр из анимации затвора камеры. Высота DIV с классом film должна быть установлена достаточно большой, для отображения canvas элементов один над другим.
DIV с классом shutterAnimationHolder иммет ту же высоту, что и в DIV с классом container, в котором он установлен и отображается над неупорядоченным списком с фотографиями.
CSS
jquery.shutter.css
.shutterAnimationHolder .film canvas{
    display: block;
    margin: 0 auto;
}

.shutterAnimationHolder .film{
    position:absolute;
    left:50%;
    top:0;
}

.shutterAnimationHolder{
    position:absolute;
    overflow:hidden;
    top:0;
    left:0;
    z-index:1000;
}
Эти три класса с префиксом .shutterAnimationHolder влияют только на разметку сформированную плагином. Этот код, в целях уменьшения запросов HTTP, можно поместить в ваш основной CSS файл стилей.
JS
Создадим jQuery плагин tzShutter, который прост в использовании и требует минимальных изменений в сайте, для его использования.
Одним из важных пунктов в разработке плагина, является обеспечение надлежащей поддержки для пользователей, чьи браузеры не понимают теги canvas (в основном все версии IE, за исключением 9-ой). Сделать это просто, достаточно пропустить генерацию canvas.
Также нужно реализовать способ вызова открытия и закрытия анимации. Добиться этого можно с помощью двух событий содержащих элементы shutterOpen и shutterClose используя jQuery метод trigger().
jquery.shutter.js
(function(){

    // Creating a regular jQuery plugin:

    $.fn.tzShutter = function(options){

        // Checking for canvas support. Works in all modern browsers:
        var supportsCanvas = 'getContext' in document.createElement('canvas');

        // Providing default values:

        options = $.extend({
            openCallback:function(){},
            closeCallback:function(){},
            loadCompleteCallback:function(){},
            hideWhenOpened:true,
            imgSrc: 'jquery.shutter/shutter.png'
        },options);

        var element = this;

        if(!supportsCanvas){

            // If there is no support for canvas, bind the
            // callack functions straight away and exit:

            element.bind('shutterOpen',options.openCallback)
                   .bind('shutterClose',options.closeCallback);

            options.loadCompleteCallback();

            return element;
        }

        window.setTimeout(function(){

            var frames = {num:15, height:1000, width:1000},
                slices = {num:8, width: 416, height:500, startDeg:30},
                animation = {
                    width : element.width(),
                    height : element.height(),
                    offsetTop: (frames.height-element.height())/2
                },

                // This will calculate the rotate difference between the
                // slices of the shutter. (2*Math.PI equals 360 degrees in radians):

                rotateStep = 2*Math.PI/slices.num,
                rotateDeg = 30;

            // Calculating the offset
            slices.angleStep = ((90 - slices.startDeg)/frames.num)*Math.PI/180;

            // The shutter slice image:
            var img = new Image();

            // Defining the callback before setting the source of the image:
            img.onload = function(){

                window.console && console.time && console.time("Generating Frames");

                // The film div holds 15 canvas elements (or frames).

                var film = $('<div>',{
                    className: 'film',
                    css:{
                        height: frames.num*frames.height,
                        width: frames.width,
                        marginLeft: -frames.width/2, // Centering horizontally
                        top: -animation.offsetTop
                    }
                });

                // The animation holder hides the film with overflow:hidden,
                // exposing only one frame at a time.

                var animationHolder = $('<div>',{
                    className: 'shutterAnimationHolder',
                    css:{
                        width:animation.width,
                        height:animation.height
                    }
                });

                for(var z=0;z<frames.num;z++){

                    // Creating 15 canvas elements.

                    var canvas    = document.createElement('canvas'),
                        c        = canvas.getContext("2d");

                    canvas.width=frames.width;
                    canvas.height=frames.height;

                    c.translate(frames.width/2,frames.height/2);

                    for(var i=0;i<slices.num;i++){

                        // For each canvas, generate the different
                        // states of the shutter by drawing the shutter
                        // slices with a different rotation difference.

                        // Rotating the canvas with the step, so we can
                        // paint the different slices of the shutter.
                        c.rotate(-rotateStep);

                        // Saving the current rotation settings, so we can easily revert
                        // back to them after applying an additional rotation to the slice.

                        c.save();

                        // Moving the origin point (around which we are rotating
                        // the canvas) to the bottom-center of the shutter slice.
                        c.translate(0,frames.height/2);

                        // This rotation determines how widely the shutter is opened.
                        c.rotate((frames.num-1-z)*slices.angleStep);

                        // An additional offset, applied to the last five frames,
                        // so we get a smoother animation:

                        var offset = 0;
                        if((frames.num-1-z) <5){
                            offset = (frames.num-1-z)*5;
                        }

                        // Drawing the shutter image
                        c.drawImage(img,-slices.width/2,-(frames.height/2 + offset));

                        // Reverting back to the saved settings above.
                        c.restore();
                    }

                    // Adding the canvas (or frame) to the film div.
                    film.append(canvas);
                }

                // Appending the film to the animation holder.
                animationHolder.append(film);

                if(options.hideWhenOpened){
                    animationHolder.hide();
                }

                element.css('position','relative').append(animationHolder);

                var animating = false;

                // Binding custom open and close events, which trigger
                // the shutter animations.

                element.bind('shutterClose',function(){

                    if(animating) return false;
                    animating = true;

                    var count = 0;

                    var close = function(){

                        (function animate(){
                            if(count>=frames.num){
                                animating=false;

                                // Calling the user provided callback.
                                options.closeCallback.call(element);

                                return false;
                            }

                            film.css('top',-frames.height*count - animation.offsetTop);
                            count++;
                            setTimeout(animate,20);
                        })();
                    }

                    if(options.hideWhenOpened){
                        animationHolder.fadeIn(60,close);
                    }
                    else close();
                });

                element.bind('shutterOpen',function(){

                    if(animating) return false;
                    animating = true;

                    var count = frames.num-1;

                    (function animate(){
                        if(count<0){

                            var hide = function(){
                                animating=false;
                                // Calling the user supplied callback:
                                options.openCallback.call(element);
                            };

                            if(options.hideWhenOpened){
                                animationHolder.fadeOut(60,hide);
                            }
                            else{
                                hide();
                            }

                            return false;
                        }

                        film.css('top',-frames.height*count - animation.offsetTop);
                        count--;

                        setTimeout(animate,20);
                    })();
                });

                // Writing the timing information if the
                // firebug/web development console is opened:

                window.console && console.timeEnd && console.timeEnd("Generating Frames");
                options.loadCompleteCallback();
            };

            img.src = options.imgSrc;

        },0);

        return element;
    };

})(jQuery);
Теперь посмотрим как используется плагин:
script.js
$(document).ready(function(){

    var container = $('#container'),
        li = container.find('li');

    // Using the tzShutter plugin. We are giving the path
    // to he shutter.png image (located in the plugin folder), and two
    // callback functions.

    container.tzShutter({
        imgSrc: 'assets/jquery.shutter/shutter.png',
        closeCallback: function(){

            // Cycling the visibility of the li items to
            // create a simple slideshow.

            li.filter(':visible:first').hide();

            if(li.filter(':visible').length == 0){
                li.show();
            }

            // Scheduling a shutter open in 0.1 seconds:
            setTimeout(function(){container.trigger('shutterOpen')},100);
        },
        loadCompleteCallback:function(){
            setInterval(function(){
                container.trigger('shutterClose');
            },4000);

            container.trigger('shutterClose');
        }
    });

});
Когда плагин заканчивает генерацию canvas элементов, происходит вызов функции loadCompleteCallback. Мы используем её для вызова анимации затвора каждые 4 секунды, сопровождающееся сменой фотографий.